My First Layer Cake!

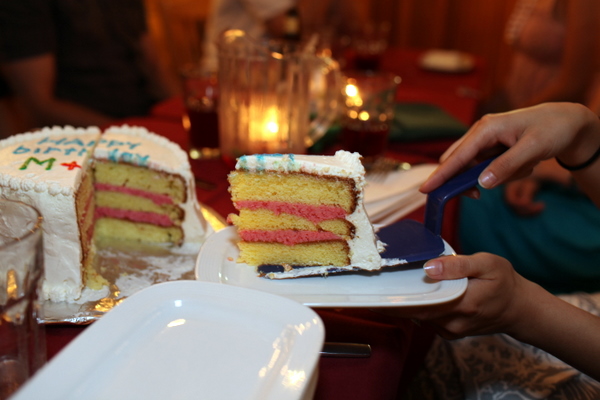
Lemon Layer Cake with Raspberry Buttercream Filling and Whipped Topping

***

Yes, that is what I’m showing you how to make today.  Have I got your attention, folks??  Sorry it’s taken me so long to write this post, *sigh*, I’m a little behind on picture uploading/editing/writing posts, if you can’t tell.  🙁  But anyways, remember the birthday cake that me, my brother and SIL made for my husband and my friend Sam?  If you need a refresher, it was mentioned in this post.  So I’ve never made a layer cake before or my own buttercream, so there were many firsts for me here.  That, and the fact that it was late at night and I’m not so great at taking indoor pictures (so sorry for the poor picture quality in some of these here)!  But I knew, I just knew, that I wanted to blog about this cake and I wanted to impress you!  😉  Oh yea, I definitely encountered a few hardships along the way and I’ll be sharing those with you!
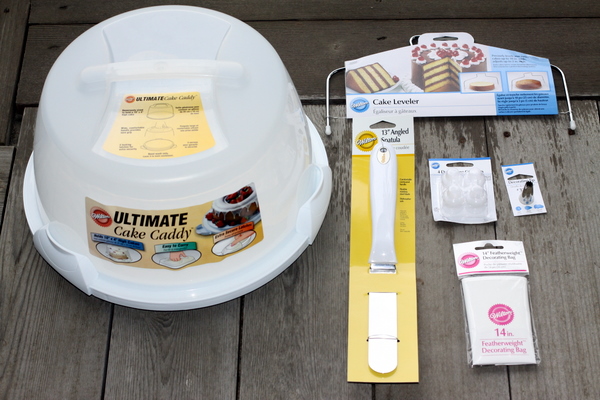
1. First off, prepare your tools.  We have the ultimate cake caddy, cake leveler perfect for layered cakes, angled spatula, decorating bag, coupler and a tip.

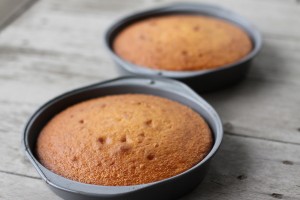
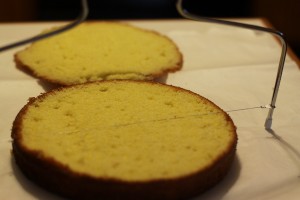
2. Don’t slap me, but I used a boxed lemon cake.  Reason being, I wanted to focus on making the cake look pretty and I didn’t want to mess up the flavor of the cake, hope you understand!  🙂  My original plan was to bake two 9-inch rounds and make 4 layers.  So with one of the 9 inch rounds, you have to use the cake level to skim off the top, and then cut that round in half again.  However, as I was cutting that round in half, it started to break apart and I realized it wasn’t such a great plan.  So I called Marv and had him get me another box of lemon cake… long story short… I’d just get 2 boxes of cake and make three (layers) 9-inch rounds and level the tops.

3. As the cake is baking, you could actually start prepping your Raspberry Buttercream (Ingredients and Directions at bottom of post).

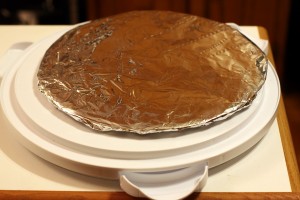
4. I cut out a cardboard box into a shape of a circle and wrapped foil around it to make my stand.

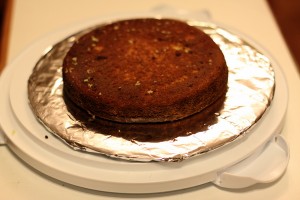
5. Place Layer #1 face down.

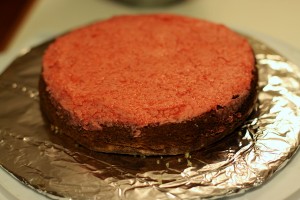
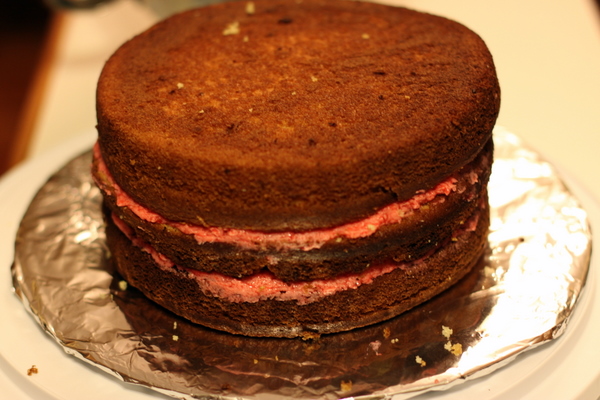
6. And here we go!  Spread the raspberry buttercream filling on top of Layer #1.

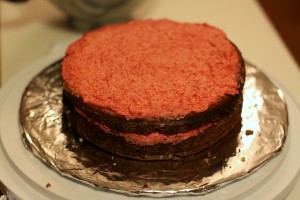
7. Place layer #2 on top and spread the raspberry buttercream filling on top of Layer #2.  See it finally forming into a layer cake?

8. Place Layer #3 on top (upside down again) and you’re DONE!

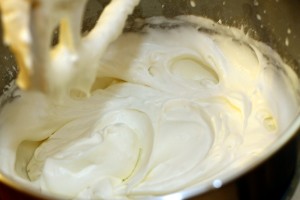
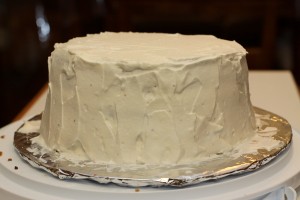
9.  Well almost.  Spread your Whipped Cream Icing (Ingredients and Directions at bottom of post) on top and sides of cake.  This is where your uber useful angled spatula comes into play!

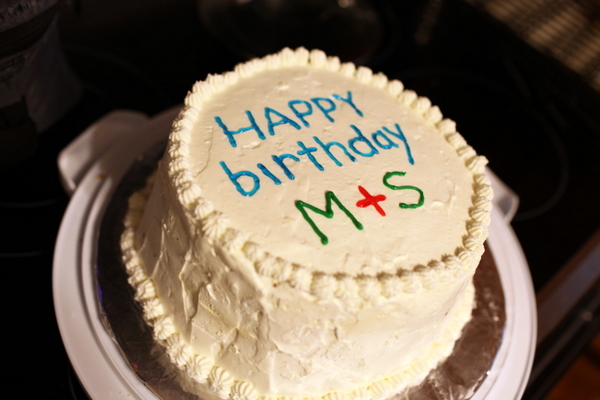
10.  My favorite part.  Ask your sister-in-law, to use her Jenny-vitica font style handwriting and icing gel to write a message.  Hire your brother to pipe the Whipped Cream Icing along bottom and top of cake.  This is where you use your piping bag, coupler and tip.  🙂

11.  Present your cake to the birthday boys, where they will simul-blow out the two candles, haha!

12. Lastly, cut the cake into slices and admire the pretty layers! 🙂

13. Oh, don’t forget to eat the cake too, but let the birthday boys have the first bite!

    Lemon Cake – bought a boxed cake mix and followed the directions, easy peasy!
    Raspberry Buttercream – I adapted this recipe from a cupcake that My Little Adventures made, I don’t remember my exact measurements though, any berry buttercream recipe should work for this!
      Ingredients:
    • 1 cup raspberries
    • 4 teaspoons granulated sugar
    • 2 teaspoons lemon juice
    • 1 stick unsalted butter; softened
    • 1 teaspoon salt
    • 3/4 cups powdered sugar; sifted

    Directions:

    1. Combine raspberries, granulate sugar and lemon juice in a sauce pan and place over medium heat. Stir frequently until juices from berries boil. Let boil for 2 minutes to raspberry make sauce more dense.
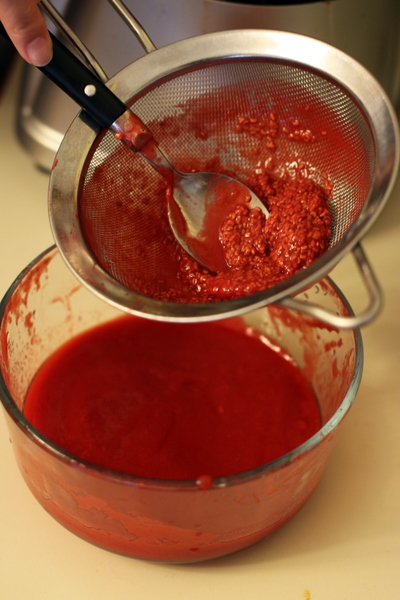
    2. Place the sauce in a strainer and push out the liquid, so that there aren’t any seeds in your sauce.  Cool in refrigerator.
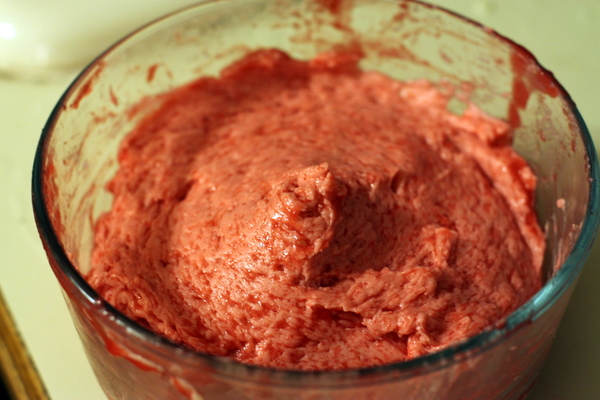
    3. Beat butter and 1 cup of powdered sugar until smooth.  Add the raspberry sauce to the mixer bowl, along with 3/4 cup of powdered sugar.
    Whipped Cream Icing – taken from one of my favorite recipe websites, allrecipes.com.

    Ingredients:

    • 1/4 cup cold water
    • 1 teaspoon unflavored gelatin (to make it hold better)
    • 1 cup heavy whipping cream
    • 1 tablespoon white sugar
    • 1/2 teaspoon vanilla extract

    Directions:

    1. Chill mixing bowl and beaters for at least 15 minutes before using. Place water in a small microwave-safe bowl. Sprinkle gelatin over water and allow to soften 5 minutes.
    2. Dissolve gelatin by microwaving for 3 minutes, stirring after every minute. Remove from microwave and let stand at room temperature for 10 minutes; gelatin must be liquid but not warm when added to cream.
    3. Remove bowl and beaters from refrigerator and pour in cream, sugar, and vanilla extract. Beat together just until beater marks begin to show distinctly.
    4. Add gelatin mixture to cream, pouring in a steady stream while beating constantly. Beat until stiff peaks form. Use immediately.

Hope I’ve inspired you to make own version of LAYER CAKE now!

39 Comments

  1. August 5, 2010 / 12:18 am

    Congratulations Sandy! It turned out great 🙂 (wish I could taste it)
    oxoxo
    Denalee

  2. August 5, 2010 / 12:27 am

    This looks great! I bet it tasted awesome with lemon + raspberry <3

  3. jennifer young
    August 5, 2010 / 12:44 am

    amazing sandy!!! come to cali and we’ll bake cakes together!
    looks yummmmmy!
    j.

  4. August 5, 2010 / 2:11 am

    Bravo Sandy! I think you did a fabulous job. I looooove Lemon cake, even the kind from the box. 🙂 I want to give this a try, but I think I was to make blueberry frosting.. mmmmm! I haven’t bake in soo long. I normally don’t like to bake in the summer time. I refuse to turn the A/C unless absolutely necessary! hee hee.

    xx Love & Aloha

    p.s. Bummer I wasn’t one of the first three. 🙁

  5. August 5, 2010 / 3:12 am

    oh well done, it looks fabulous!

  6. August 5, 2010 / 3:42 am

    Hey Sandy, I came over from Hello Serendipity. Your blog is so nice! And the cake looks extremely delicious. Hmmmm …. Greets from Germay, caro

  7. August 5, 2010 / 6:13 am

    Umm! Amazing! You are a woman full of so many talents. I’m not the best baker so I think it will be awhile before I attempt anything like but yours looks fantastic!!

  8. alely
    August 5, 2010 / 6:52 am

    congratulations Sandy on your first layer cake! it turned out loveLee! i’ve never made a layer cake once for one of my kids birthdays but haven’t tried it again. this recipe sounds yummy so i will have to copy, paste, print and put it in my recipe binder so that the girls and i can try this! thanks for sharing. glad you are now back home for at least a couple of days!

  9. August 5, 2010 / 7:38 am

    Looks yummy!

  10. August 5, 2010 / 8:00 am

    You are a baking whiz that is for sure. Your cake looked beautiful almost too good to eat. Great job lady!!

  11. August 5, 2010 / 8:09 am

    That cake looks so amazing!

  12. August 5, 2010 / 8:10 am

    girl, this looks beautiful AND yummy!!! and it looks like everyone else enjoyed it too. so fun!!!

  13. August 5, 2010 / 8:28 am

    yummm! you go girl. That cakes looks fantastic!!

  14. August 5, 2010 / 8:40 am

    It looks so delicious! I want to try making one.

  15. August 5, 2010 / 9:46 am

    Yum! There is absolutely nothing wrong with boxed cake!! 🙂 I need to bake more!

  16. August 5, 2010 / 10:09 am

    OH MY GOODNESS! I need it to be someone’s birthday so I can make this. YUM!!!!!!

  17. Nancy
    August 5, 2010 / 10:57 am

    yes…if i remember correctly, it was DELICIOUS!!!

  18. August 5, 2010 / 11:35 am

    great job, Sandy. The cake looks awesome! You’re so talented.

  19. ChantaleP
    August 5, 2010 / 11:35 am

    Wow, that looks so professional! lol! Amazing job.. looks fantastic. Sandy, look at you! Great photography, great blog, prob amazing wife and now this! Oh I’m jealous… I joke. Love this!

  20. August 5, 2010 / 11:48 am

    great job on your first layer cake! it does take a lot of work, doesn’t it? 🙂 i haven’t made one in a while since my cake decorating classes.. after seeing your post, i might have to do one soon!

  21. August 5, 2010 / 1:29 pm

    girl way to go! looks amazing!!

  22. August 5, 2010 / 1:30 pm

    it’s looks wonderful sandy!! jenny-vetica is the coolest typeface! nice job!

  23. maria
    August 5, 2010 / 1:31 pm

    yum! But yes…extremely time consumming, reminds me of the time Ro and I made the layer choco cake with almond creme filling and homemade icing for ur bday a few years ago…delish but takes awhile! 😉

  24. August 5, 2010 / 1:50 pm

    You could do posts like these everyday and I’d be a happy camper….I have such a sweet tooth!! This looks so yummy I can’t stand it 🙂

  25. August 5, 2010 / 2:34 pm

    ooo.. the layers do look pretty 😀

  26. August 5, 2010 / 7:36 pm

    great job! the layers do look lovely. Raspberry is one of my favourite cake flavours. Yum!

  27. August 5, 2010 / 8:20 pm

    that looks delicious!!! well done!!

  28. August 5, 2010 / 8:23 pm

    This looks AMAZING.

  29. August 6, 2010 / 1:01 am

    yumm..the filling looks delish. I laughed when i saw the first pik cuz the first time i made one i bought the same wilton stuff u did.lol

  30. August 6, 2010 / 3:08 am

    good job sandy. this cake looks delicious!!

  31. August 6, 2010 / 4:01 am

    oh wow, it came out great!!
    i have never attempted a layer cake before (too intimidating!), but if you had the guts to try it, then i shall too sometime!

    (and there’s nothing wrong with boxed mixes! ;D in fact, i don’t know where i’d be without those haha)

    <3

  32. August 6, 2010 / 2:30 pm

    Excellent work, Sandy! I always love a good layer cake.

  33. August 6, 2010 / 9:16 pm

    It looks GREAT! I’m definitely going to try this recipe some time. Thanks Sandy! 🙂

  34. August 7, 2010 / 9:46 am

    YUM! looks and sounds delicious! nice work sandy!

  35. August 9, 2010 / 12:43 am

    HOLY DELICIOUSNESS!
    THIS IS INCREDIBLE!
    you are quite the baker! i love the flavors you chose.. lemon and raspberry YUM!
    i’m definitely bookmarking this to make in the future!

  36. August 9, 2010 / 12:01 pm

    this cake looks amazing~!!

Leave a Reply

Your email address will not be published.

This site uses Akismet to reduce spam. Learn how your comment data is processed.