


 In Stitches
One of my favorite crafting/sewing/knitting blogs to look at is

Besides the pretty images and plethora of talent displayed on Alli’s blog, what really caught my attention was the OPB sew-a-long projects that she hosts. She picks one pattern to sew, and gathers people from all around the world to join in her sewing a new project in the time span of a few weeks. Currently, they are on their third week of sewing the Burdastyle Marie Skirt, but because I just got my sewing machine back from the shop and I don’t know how to sew pleats or zippers (yet) I decided to opt out of this project and maybe join the next time around. So as I was perusing through the Burdastyle website, I found a simple reversible apron that was first made at a sewing club in Australia (the one place I have no been and want to go SOO badly). So, I figured I’d take on the daunting task of learning how to sew something on my own (with just a pattern and directions in hand and no one to guide me). Well first of all, a little plug for Burdastyle, it’s basically a sewing website where people upload their patterns and projects. There are a number of FREE projects and some that cost money, but either way you will need to set up an account. And this apron I made happened to be a lovely free project! So first, I had to log in and click “Get It” and it places this apron into your “Shopping Cart” and then you are able to download the printable pattern.

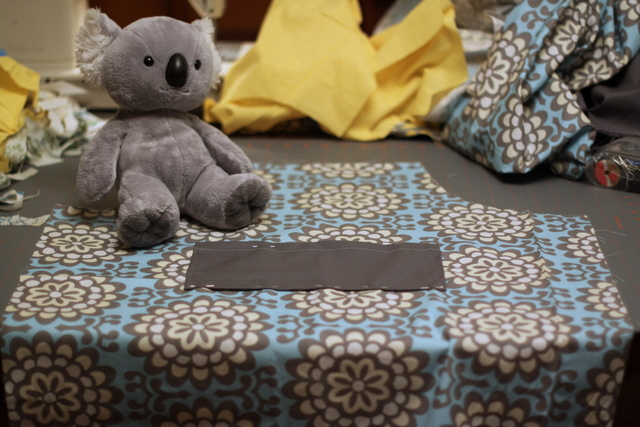
The pattern consisted of 10 sheets of paper ( plus an instruction page). I taped them together and cut out two pieces, one for the apron and one for the pocket.


To make a reversible apron, you would cut out two pieces of (coordinating) fabrics per pattern. Note, that for the apron pattern, you will need to foldover your fabric on the straight side so that when you unfold it, it will be symmetrical and it makes for an easier cut! I actually decided to not do a reversible apron for this one, for time’s sake, but it’s a great idea!

Then cut out two pieces of fabric for your pockets. Again, I just cut out one piece since I didn’t make this a reversible apron.


First you will need to sew the top edge of your pocket. Then carefully pin the pocket to the center of the apron and sew the sides and bottoms of the pocket to the apron. Also, if you would like to create two pocket compartments, make sure to sew a line down the middle of the pocket as well.

And then finally you will need to pin the side ribbons/straps to the apron (and make sure the ribbon goes inside the two fabrics so that when you turn it out, the ribbon will be on the outside). Then you will sew along the sides and bottom of the apron. Leave an opening at the very top of the apron so you can flip it inside out from there.


The last step would be to pin the top ribbon to the top of the apron and stitch close the top of the apron + topstitch the sides and bottom of the apron to give it a cleaner, more professional look. And of course, take some photos of your finished product! 🙂


And then have a photo shoot with it too.
Whew, that was one heck of a project. I must admit, I did spend the better half of my Saturday night making this apron, but it’s only b/c I am super picky about having straight lines and centered pockets. Well, and I did take some breaks for food, water, catching up on blogs and TV. When I make this apron again I’m thinking it will only take about 2 hours from start to finish? That’s not too bad. That means I could crank out 8 in a day (considering 8 hours of sleep). Friends, don’t be alarmed if you receive one of these as a present one of these days. 🙂 Anyways, I actually packaged this apron up and sent it along to my future sister-in-law as a Bridal Shower present, since I am not able to attend her party. I hope she can make great use out of it and I really hope it doesn’t fall apart after only a few uses, heh.
Here are a few sewing tips I’ve learned along the way.
1) When cutting fabrics from templates or fabrics on top of each other, make sure to pin pin pin! Make sure you pin every few inches if possible and definitely the corners.
2) Make sure to always backstitch at the beginning AND end of each thread. This ensures that your thread is sturdy and will not come loose.
3) Always reinforce your stitches in areas where there may be a lot of pressure on the fabric, such as the top ribbon for this apron or straps for purses.
4) Have an ironing board handy for making those seams smoother.
5) And I said it above and I’ll say it again, topstitching (no matter how tedious it may seem) really adds a nice professional touch to most projects!
Lastly, I’d like to thank my MIL for introducing me to the world of sewing, Jieun for inspiring me to sew an apron so I could give it to you, Alli from One Pearl Button for introducing me to Burdastyle (I promise I will be joining one of your OPB sew-a-long projects soon), Amy Butler for making this beautiful fabric, and to the lovely lady who created the pattern for this apron in an easy to follow format and shared it. 🙂
![]()


